在 WebRTC 开发(五)编译与运行 Mac 工程 一文中,介绍了如何运行 Mac 工程,可以参考其流程,来运行 iOS 工程,将 WebRTC 应用安装到 iOS 设备上。
编译 WebRTC 的 iOS 工程
进入 WebRTC 源码目录
1 | cd /Users/suntongmian/Documents/workplace |
修改 iOS 应用的 Info.plist 文件
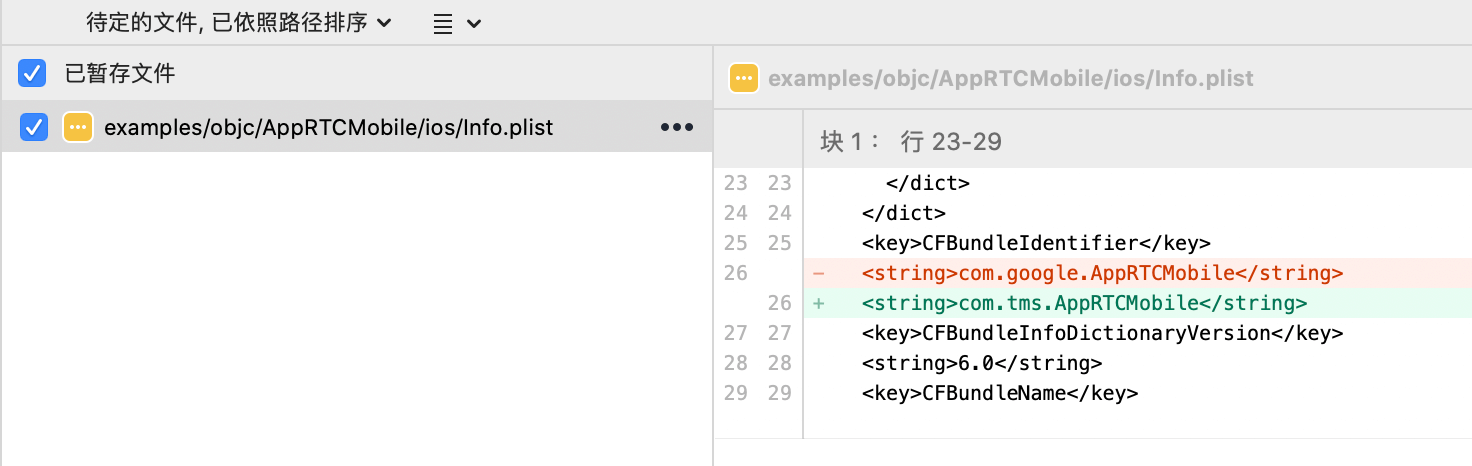
为什么要修改 Info.plist 文件?原因是运行 iOS 应用,应用的 bundle id 和 iOS 证书要匹配。
编辑 examples/objc/AppRTCMobile/ios/Info.plist
1 | vi examples/objc/AppRTCMobile/ios/Info.plist |
根据 iOS 证书来指定一个可用的 bundle id,替换下面的 com.google.AppRTCMobile
1 | <key>CFBundleIdentifier</key> |
改为
1 | <key>CFBundleIdentifier</key> |
配置 depot_tools 工具的路径
查看 ~/.bashrc 文件中是否配置有工具 depot_tools 的路径
1 | cat ~/.bashrc |
启动 gn 工具
1 | source ~/.bashrc |
创建 iOS 工程
生成 iOS 平台的 Xcode 工程
1 | gn gen out/ios --args='target_os="ios" target_cpu="arm64" ios_enable_code_signing=true ios_code_signing_identity="Apple Development: tongmiansun@gmail.com (7XVLGK8W92)"' --ide=xcode |
执行结果:
1 | Generating Xcode projects took 108ms |
启动 Xcode 工程
1 | open -a Xcode.app out/ios/all.xcworkspace |
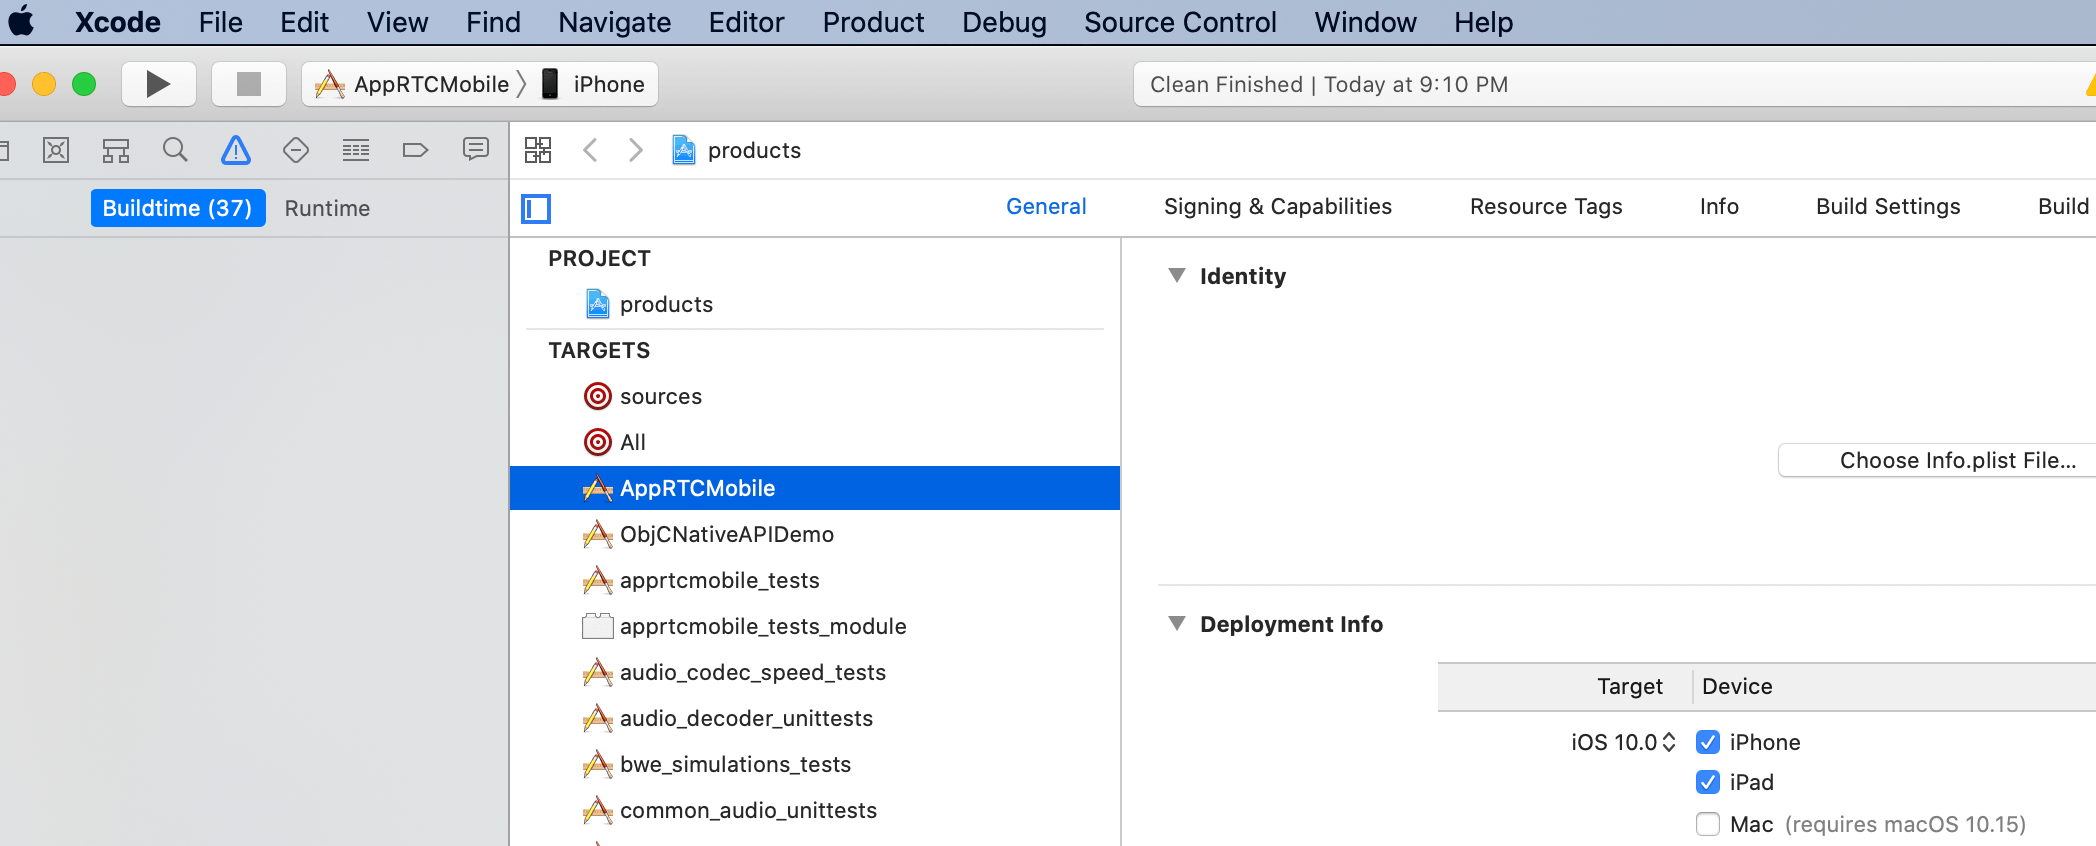
配置 iOS 工程
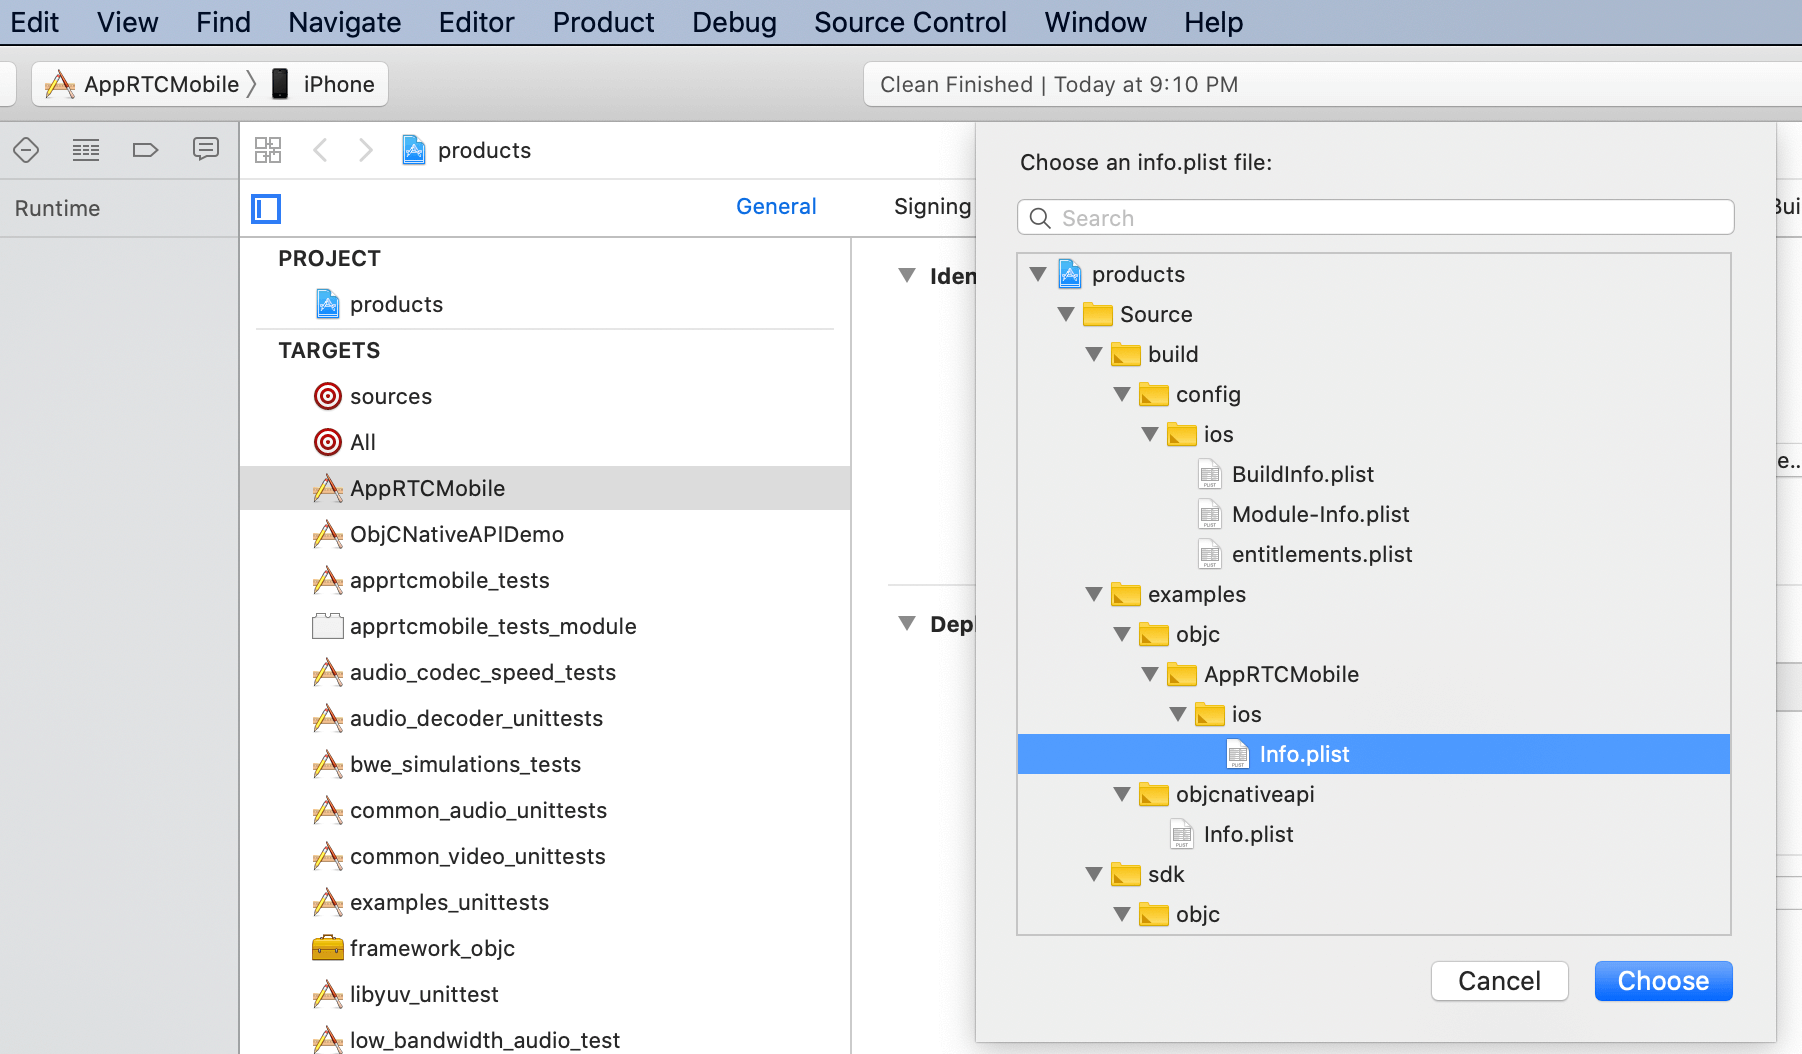
打开 iOS 工程后,需要配置工程的 Info.plist,选择 examples/objc/AppRTCMobile/ios/Info.plist 作为工程的配置文件。
选择 Info.plist 文件
加载 Info.plist 文件后

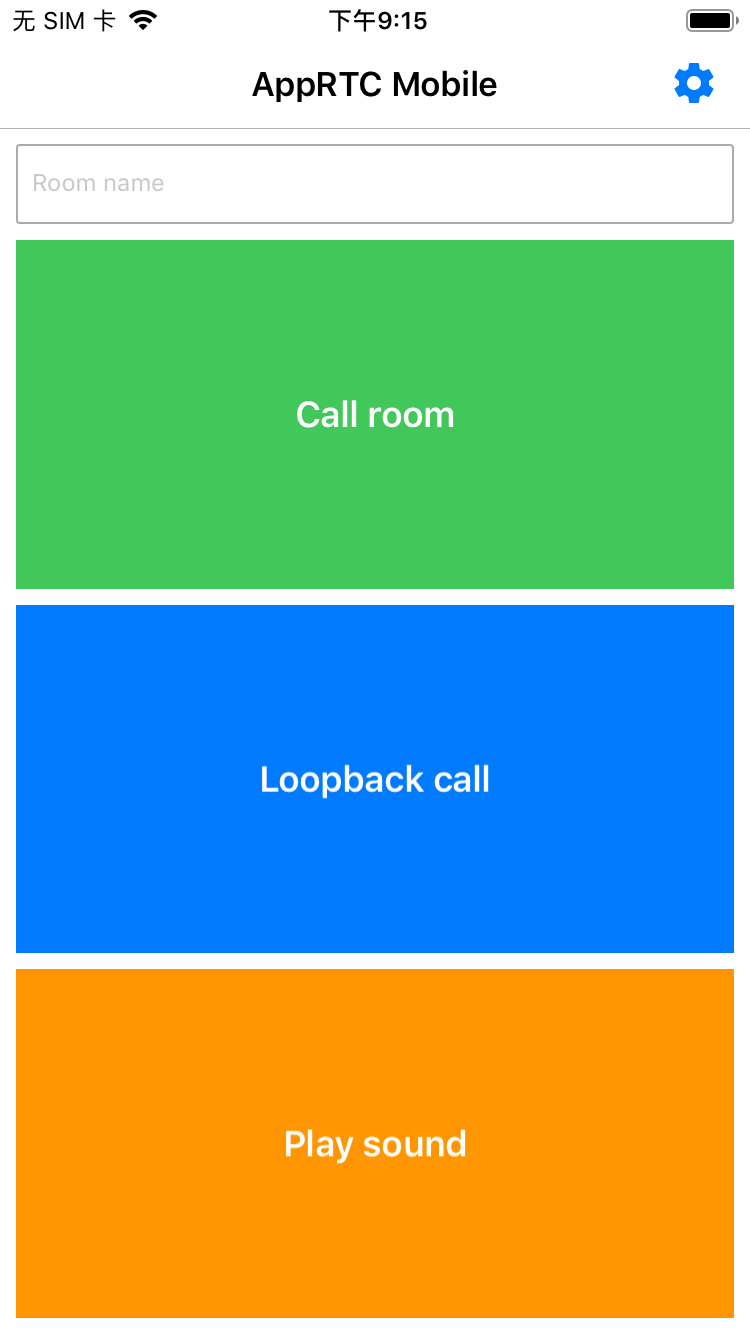
运行 iOS 工程
按下 command + R 键运行工程,好点的机器耗时5分钟,差一点的机器需要耗时10分钟,就可以将 WebRTC APP 安装到 iOS 设备上了。
工程编译时间长短跟 Mac 设备性能有关系,性能强的 Mac 设备编译速度快很多,如果你的设备耗时 10分钟以上了,说明你要换 Mac 设备了。

参考文献